Connect Your Clock
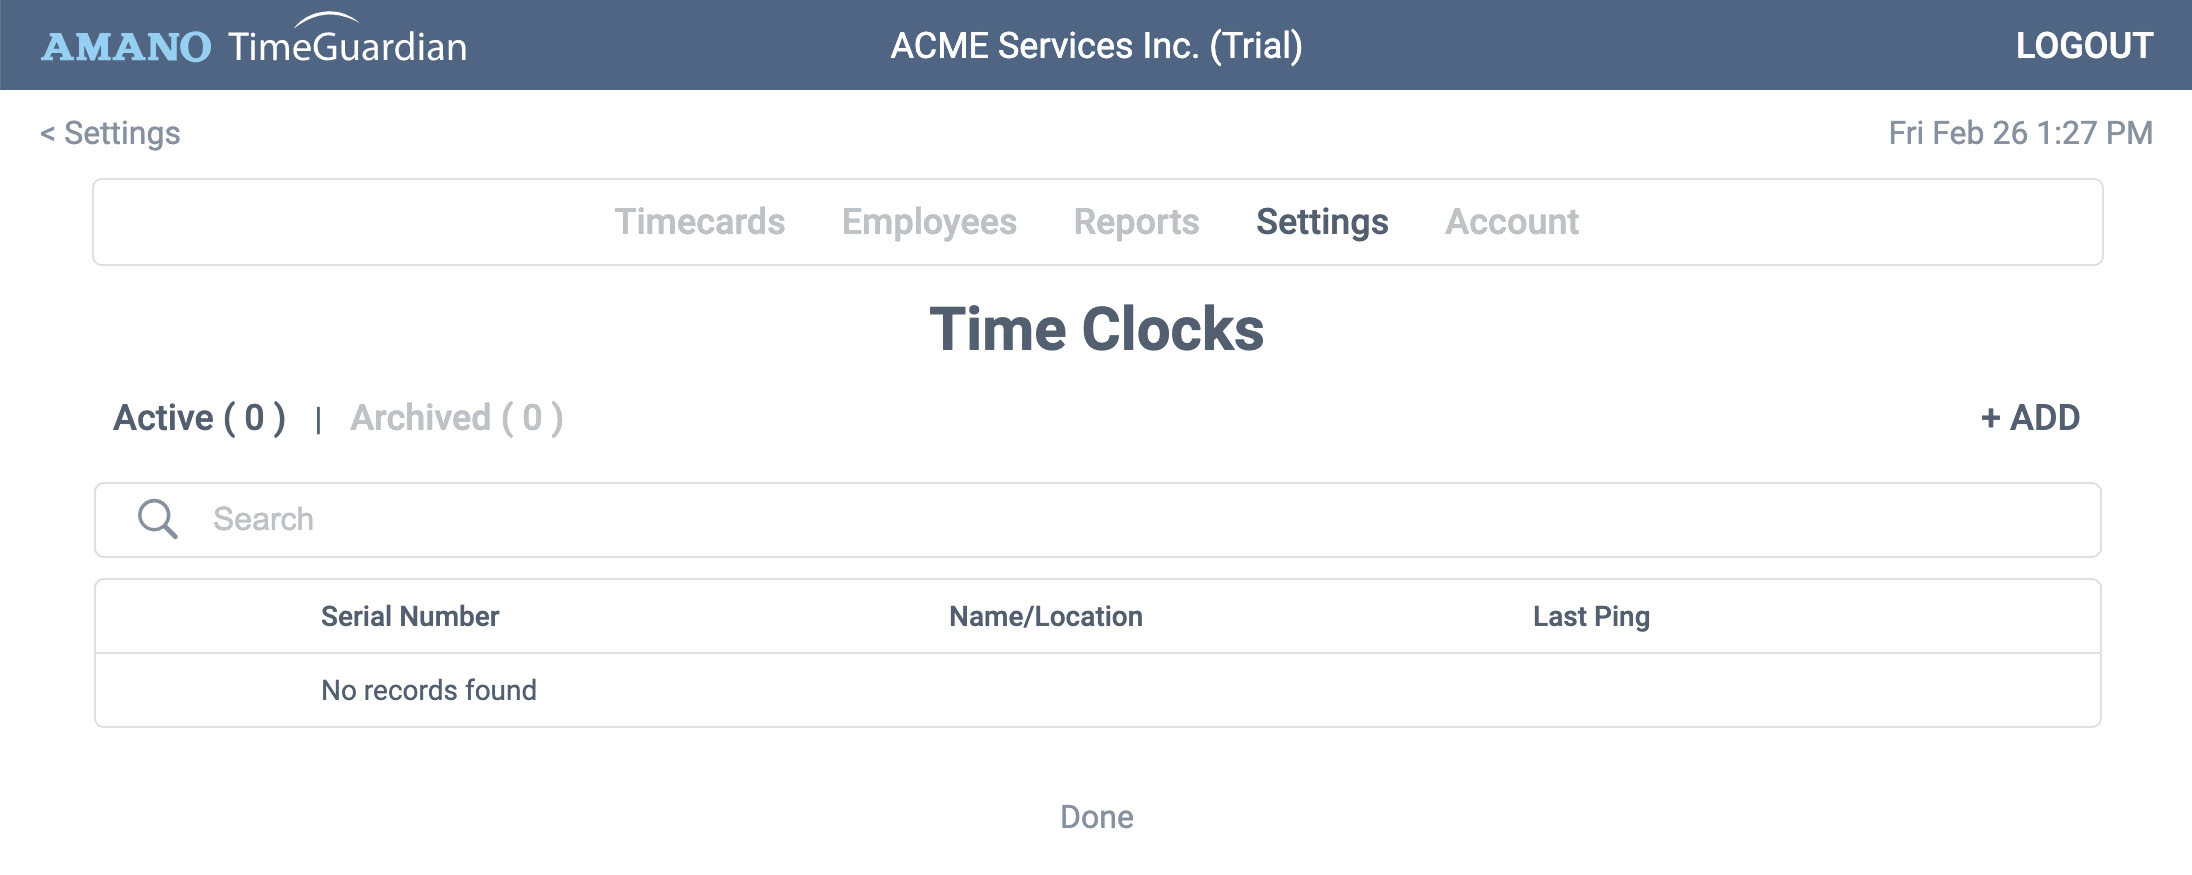
Step 1: Go to the time clock list
Before you power your time clock and connect with WiFi (or ethernet), the FIRST step is to enter your clock into your account. Use the path above to view your time clock list. In this example, there are no time clocks entered yet.
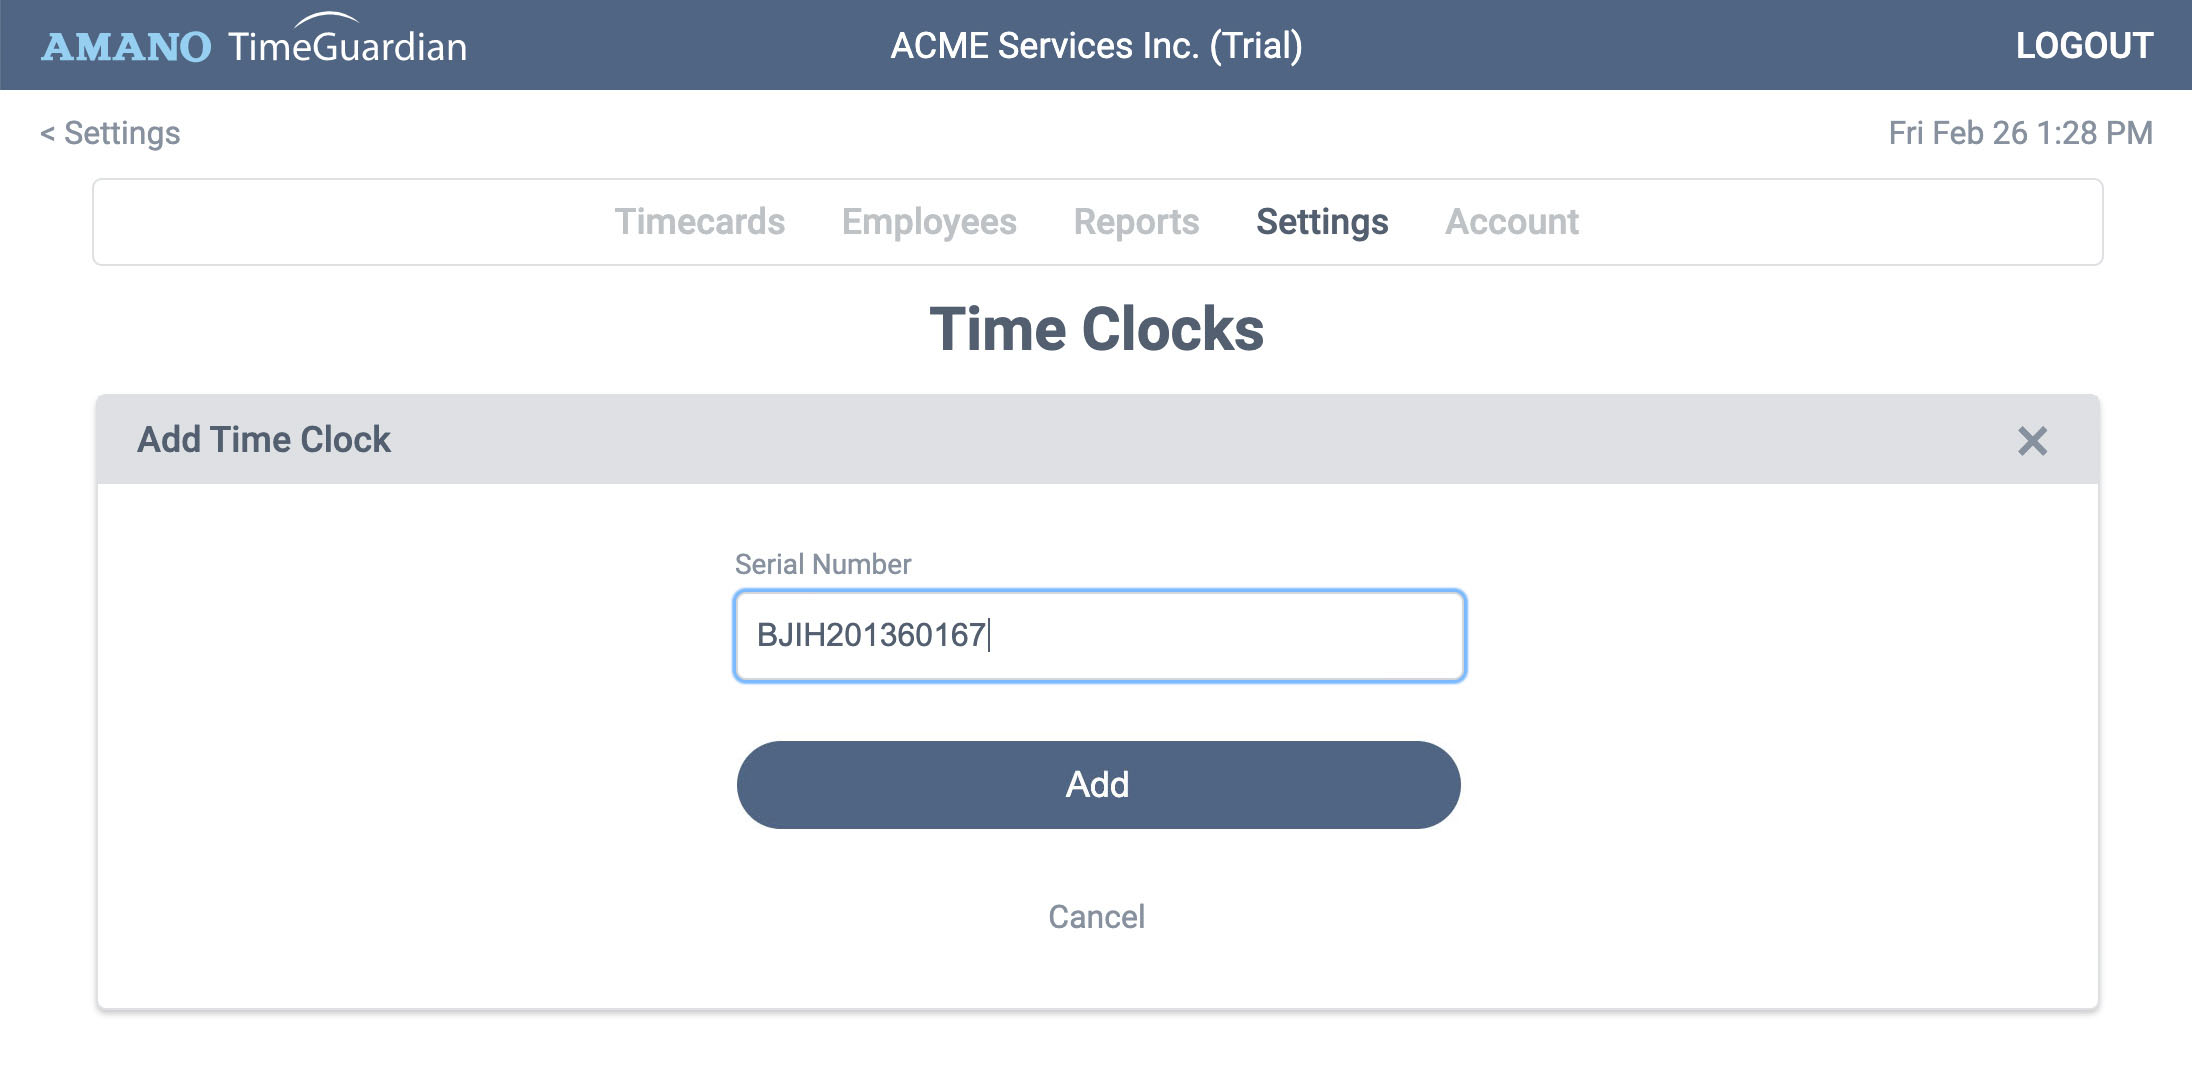
Step 2: Add a clock to your list
To add a time clock to your list click the + Add button and enter the serial number of your clock. The serial number can be found on a white, printed label on the back of your clock.
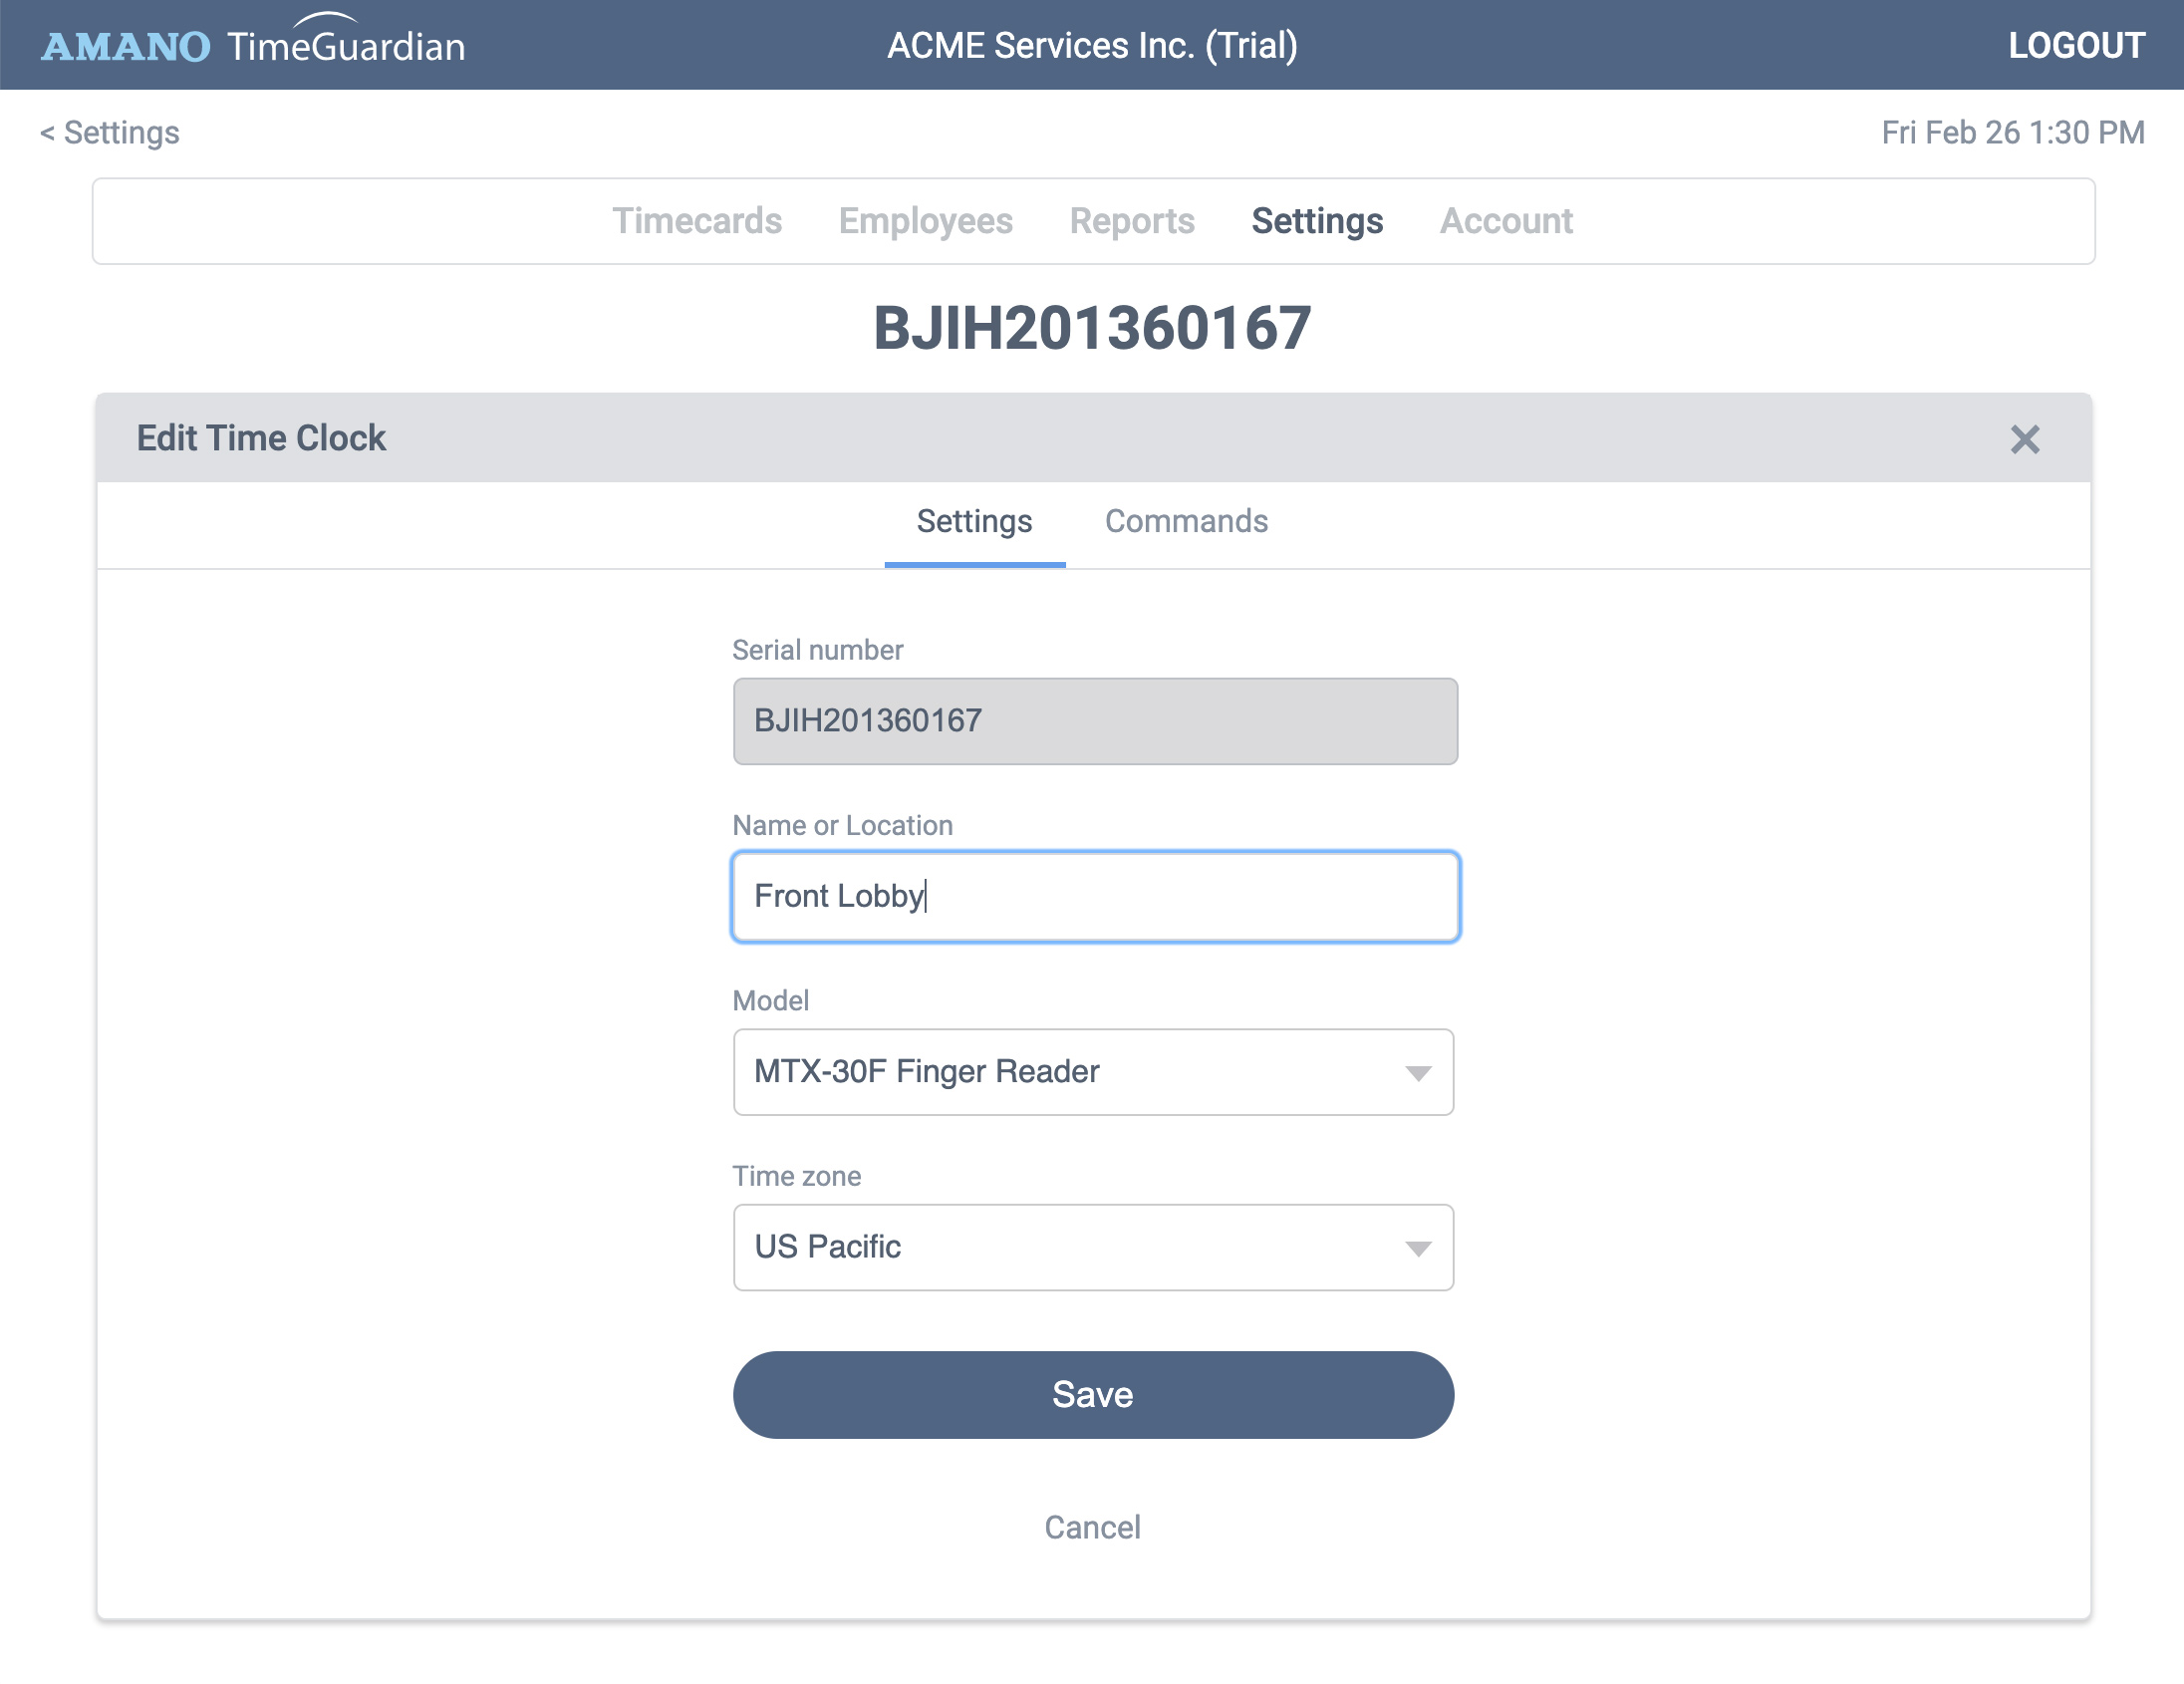
Step 3: Edit your clock info
Once you click the Add button, your default clock info will display. Now enter a location (or name) you would like to use to identify the clock. Also make sure the time zone is correct. When finished, click Save
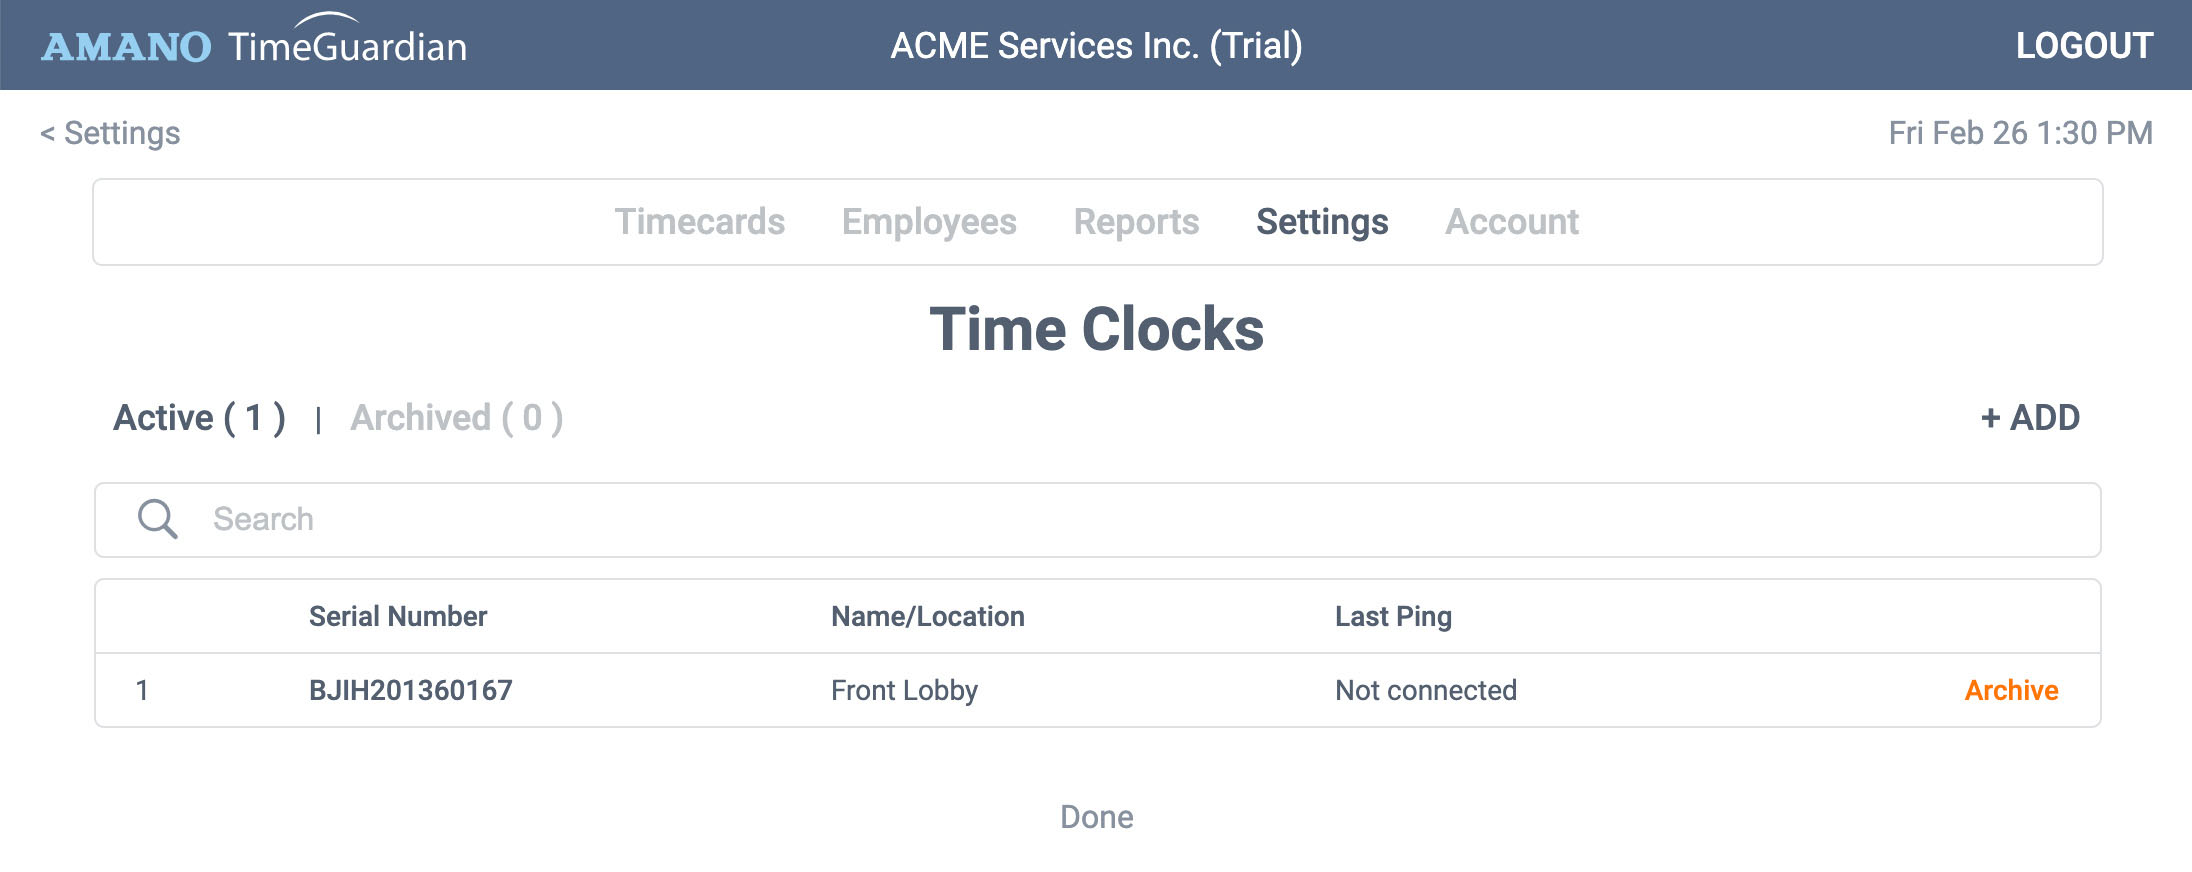
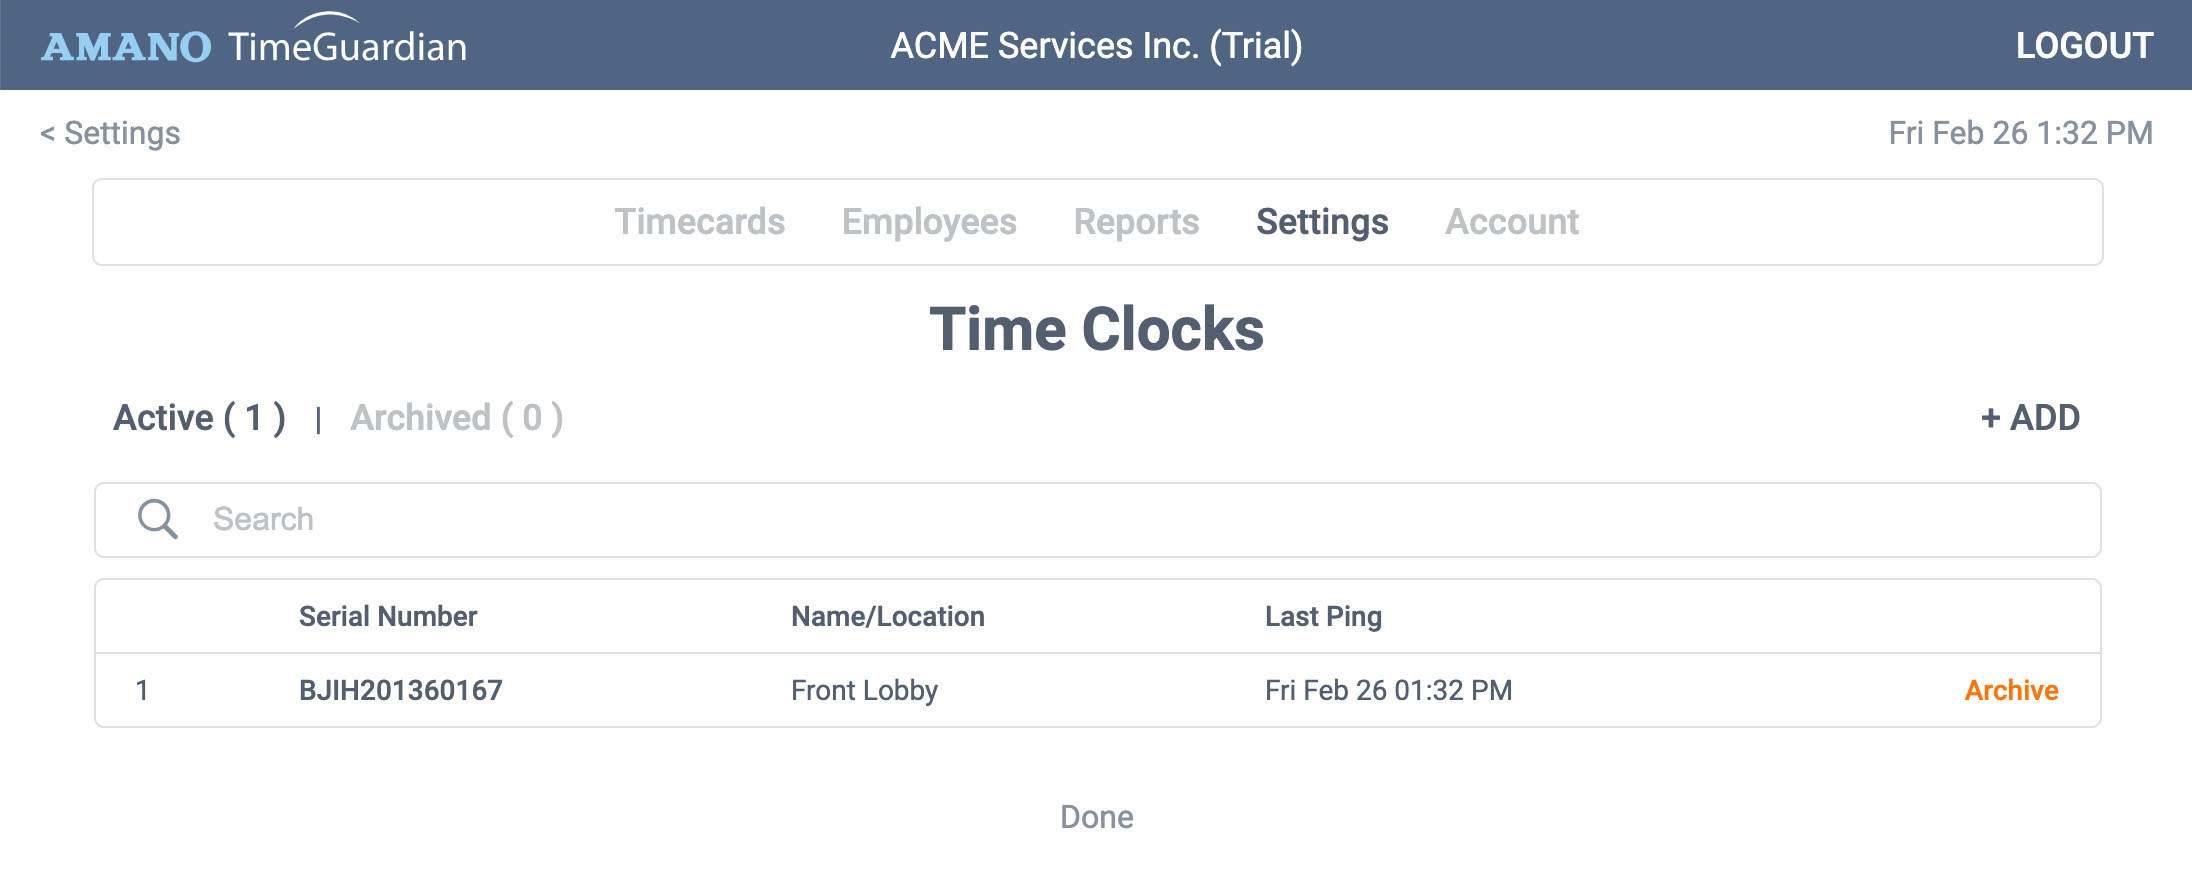
Once you click the Save button and click the Done link, you should see your time clock on your list. However it isn't connected yet.
Step 4: Connect your clock to power
Now that your clock's serial number is entered in your account, go ahead and connect your power cord. Once the clock boots up, please follow the included directions to either connect using WiFi or connect using an ethernet cable.
For some models, the WiFi setup guide may not be included in the package. In such cases, please download our New WiFi Setup Guide.
Connecting to ethernet is as simple as connecting your ethernet cable to the back of the clock. Connecting to WiFi requires you press the menu button and update your COMM settings. Please reference the instructions found in your clock package.
Our clocks come pre-prgammed to connect with the TimeGuardian servers. Our AFR series clocks will display a green "globe" icon on the upper right letting you know that you are connected.
If you have trouble connecting, please reach out to Amano Support at 1-800-896-7035 (option 3). We'll be happy to help.
Step 5: Confirm your connection
To make sure your clock is connected to your network, look for your Last Ping. That indicates the last time your clock sent a command request to the TimeGuardian servers. It also confirms your clock is connected to your account.
Step 6: Sending commands
TimeGuardian allows you to send commands to your clock. Once a command is sent, our servers wait until your clock makes the next Ping. Once it pings, the clock will answer to the requested command. Please allow up to 10 minutes for a command to be completed.
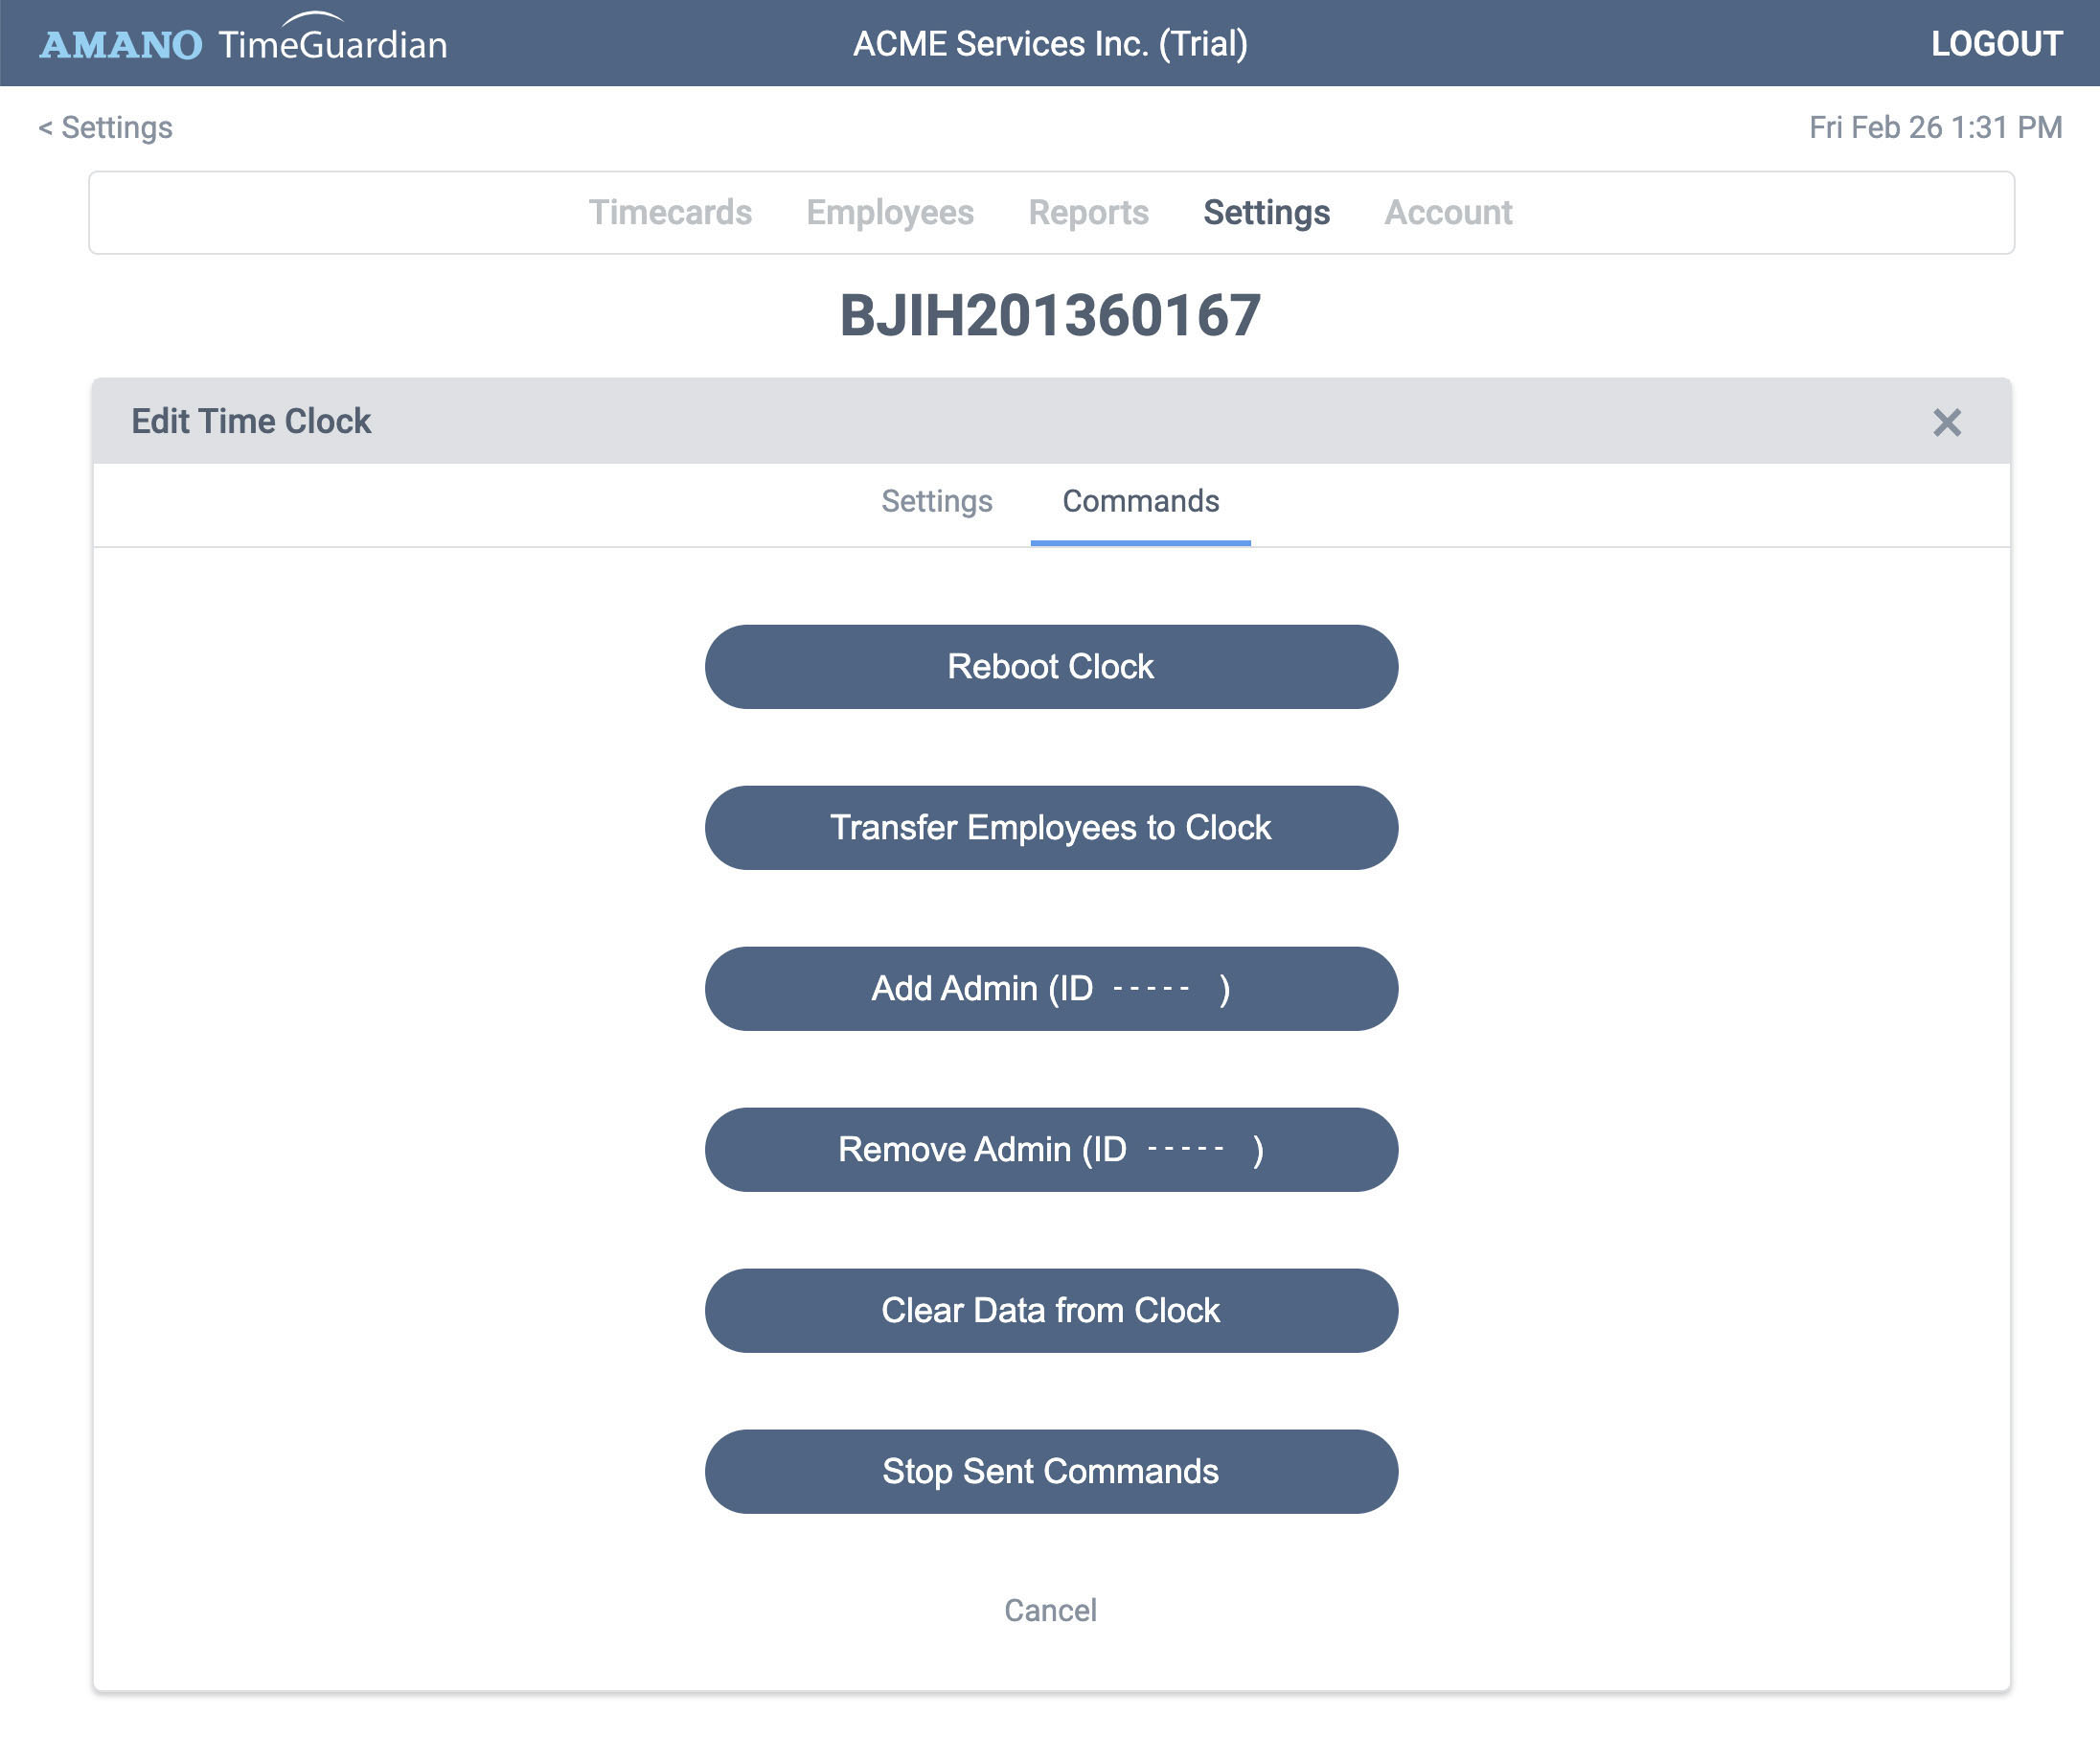
Reboot - Sends a command to the clock to turn off, then back on again. Useful, for example, if you need to change the time zone of the clock.
Transfer Employees to Clock - Sends your entire list of employees to this clock. Be aware this can take several minutes depending on how many employees you have.
Add Admin - Adds an admin user to the clock. When this happens, your clock menu will lock preventing unauthorized access.
Remove Admin - Removes the previously added admin from the clock. If no other admin users are on the clock, the menu will unlock.
Clear Data from Clock - WARNING this will remove all data from the clock. Please consult support if you are not sure.
Stop Sent Messages - Removes any pending commands to your clock.